Witam

Jeszcze kilka dni temu byłem całkowicie zielony, ale przebrnąłem przez instalacje i postanowiłem się tym podzielić

Instalacja składa się z trzech kroków:
1) Musimy zainstalować program
Java SE Development Kit. Otwieramy tą stronę:
http://www.oracle.com/technetwork/java/javase/downloads/jdk8-downloads-2133151.html, akceptujemy licencje i pobieramy ( Windows x86 ). Instalujemy tak jak na zamieszczonych screenach


2) Potrzebujemy także:
SDK Tools. Możemy to pobrać z tej strony
http://developer.android.com/sdk/index.html#Other, wybierany: installer_r24.0.2-windows.exe
I instalujemy:


Zmieniamy ścieżkę na C:\Android ( w necie czytałem, że nie powinno być spacji, więc program files odpada)


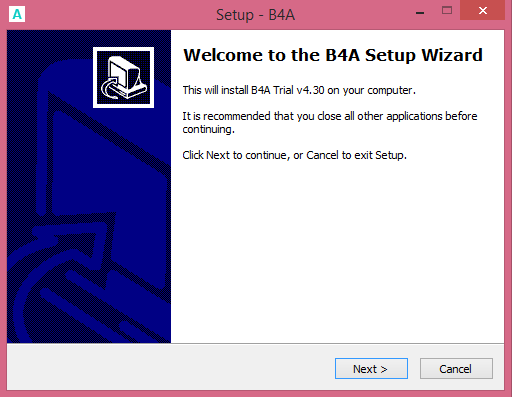
3) Ostatnim krokiem jest zainstalowanie B4A. Pobieramy z tej strony:
http://www.b4x.com/b4a.html, następnie klikamy dwa razy:


Teraz pozostała tylko konfiguracja. W programie B4A wybieramy Tools --> Configure Paths

I klikamy OK
Zapomniałbym. Na smartfona pobieramy
B4A-Bridge, następnie wybieramy Start - Wireless ( jeśli łączymy się przez wifi ).
Teraz już na komputerze wchodzimy w Tools --> B4A Bridge --> Connect - Wireless --> New IP i wpisujemy IP telefonu.
Aby udowodnić, że wszystko działa napiszemy program "Hello World".
W obszarze
Sub Activity_Create(FirstTime As Boolean) wpisujemy np: Msgbox("Hello World", "Pierwszy program")
Zapisujemy program gdzieś na dysku, następnie klikamy
Run Na ekranie telefony pojawi się pytanie czy chcemy zainstalować aplikacje.
Efekt:
 ------------------------ [ Dodano po: 4 minutach ]
Jeśli kogoś interesuje komunikacja UDP ( np z modułem wifi ):
http://forum.atnel.pl/topic10744.html Kanał - ATNEL tech-forum